

Quick Print Guide: Folding

Folding can do two things: make your print piece easier to handle, or turn it into something far more eye-catching and engaging. Either way, folding plays a big role in how a printed item looks and feels. So it pays to know the basics.
Whether you’re designing a leaflet, brochure, or booklet, understanding how folding affects layout, print quality, and cost will help you avoid headaches later on.
Design Smarts: How folds can trip you up
Folding sounds simple, but the more folds you add, the more likely things are to go out of line.
Here’s a quick test: grab a sheet of paper and fold it in half four times. You’ll end up with 32 pages, and you’ll notice the page edges no longer line up neatly – they stagger. That’s what printers call variation in register. And it happens more as the paper gets thicker or the number of folds increases.
So what should you do?
- Watch for design splits: If your design runs across two pages, try to place it on a natural spread (the middle pages of a folded section) where alignment is most accurate.
- Gate folds need breathing space: If you’re using an open or double gate fold, leave a small gap in the centre – 3mm to 15mm – so the pages don’t clash when folded.
- Flaps need flexibility: If you’re adding a flap to a catalogue or magazine, make it around 5mm shorter than the other pages so it can open freely once everything’s bound.
- Keep it foldable: Too many folds can make your item too thick or too small to fold cleanly. As a general rule, keep the thickness under 2mm before folding (which results in a final folded thickness of around 4mm).
Production pointers: Paper, cracking & Cost
Once your design’s ready, there’s a bit more to think about when it comes to production.
Here’s what matters:
- Paper choice counts: Thicker paper (over 115gsm) should have the grain running parallel to the fold. If not, you’ll need to crease or score it to stop it cracking (this adds cost).
- Solids near the edge? Add bleed: If your design includes solid colours or images running off the edge, give the printer a bit more paper to work with. This helps prevent curling and delays.
- Concertina folds need more cover width: If you’re creating a concertina-style leaflet, the front page needs to be slightly wider to cover the folded panels behind it.
- Lamination can limit folding: If your print is laminated or varnished on both sides, folding might not be possible. Check with your printer first. A machine varnish (applied during printing) usually folds fine.
- Thin paper is trickier: Folding paper below 60gsm is possible, but you’ll get more waste, and you’ll need a skilled production team.
- Allow for trimming: If you’re trimming after folding, leave a 10mm margin. And if you’re printing the job “2-up” (two on one sheet), make sure there’s a 6mm gap between copies if there are bleeds.
Folding Options cheat sheet
If you’re using print as part of your marketing mix (and we think you should), then getting to grips with your folding options is a smart move.
Why? Because it gives you more creative freedom to design something that’s both user-friendly and impactful, which often leads to better engagement and response rates. Plus, it helps you have clearer conversations with your printer, avoid any confusion, and get the best value from your print budget.
Here’s a quick guide to the most common fold types you’re likely to come across. These are the terms your printer will use, so knowing them helps make sure you get exactly what you want.
Single Fold
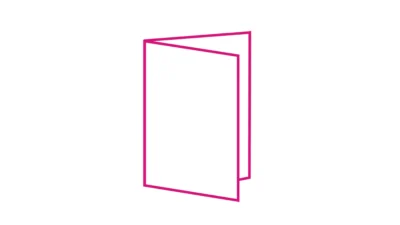
The classic. A sheet folded once down the middle, giving you four pages. Think basic flyers or simple menus.
Standard (Tri) Fold

Folded twice to create six panels. Perfect for leaflets or brochures that need to guide the reader through a sequence.
Gate Fold
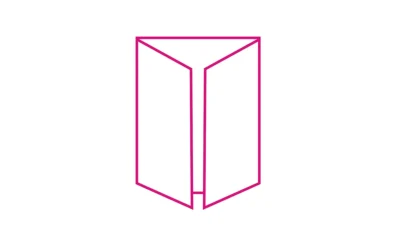
Two panels fold inward to meet in the middle, like gates. Usually six pages (6pp) and often used for bold reveals or product launches. Double gate folds go one step further: both flaps fold in, then the whole thing folds again.
Best suited to sheet-fed presses, especially for long or square formats.
Concertina (Z) Fold
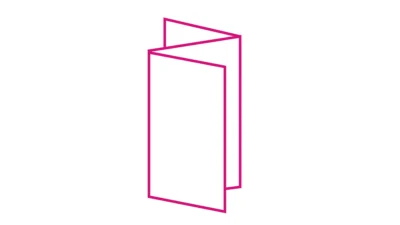
A zigzag fold, where each panel folds the opposite way to the last. Great for step-by-step guides, but note: they can’t be mechanically inserted, as there’s no closed edge.
Roll Fold (Parallel Over & Outer Fold)
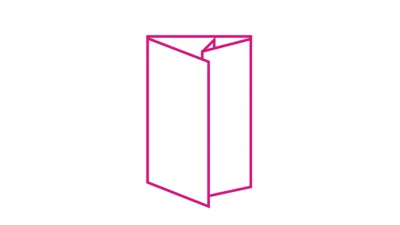
One panel rolls in over the next, continuing to the final size. Ideal for inserts as it gives a clear edge for inserting machinery to grip. But because each panel needs to be slightly narrower than the last, artwork has to account for it.
Tip: Web presses can’t finish roll folds inline – these need offline folding.
Square Fold (aka French or Right-Angled Fold)
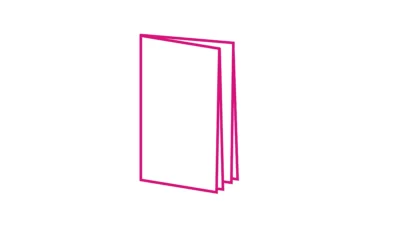
Common for posters. Folded multiple times down and across to become compact. Perfect for inserts that unfold into something impressive.
Typically used on large format (B1+) sheetfed presses.
Map Folds (Parallel & Reverse)

Used for (you guessed it) maps. These are specialised folds designed to open out wide and refold neatly. Often used for tourist guides, transport maps, and large-format instructions.
Endorsement Fold

The product is printed and finished (e.g. stitched or stapled), then folded down again to a smaller size (like DL). Handy for larger flyers being inserted into smaller envelopes or national press.
Letter Folds (Standard & Concertina)

Folded in half, then folded again either in the same direction (standard) or in a zigzag (concertina). Common for letters, mailers, and inserts.
Top Tip: Be Specific
Folds are usually priced per 1,000 units, and the more complex the fold, the higher the cost. So be crystal clear with your printer when placing your order. Specify exactly what kind of fold you want, and they’ll be able to give you an accurate quote. No last-minute surprises.
Got questions about folds, finishes, or formats? Get in touch! We’ll help you find the best way to make your print work harder.